Creating a logo can seem daunting, especially if you’re not a trained graphic designer. However, with the right tools and guidance, you can easily design a professional-looking logo.
Photoshop, a widely used image editing software, provides a powerful platform for logo creation. Its extensive features and flexibility make it a popular choice among both beginners and experienced designers.
In this article, we’ll walk you through the steps to create a logo using Photoshop. By following these guidelines, you’ll be able to craft a unique and memorable logo that represents your brand effectively.
What is Photoshop?
Photoshop is a versatile image editing software developed by Adobe. It offers a comprehensive set of tools for creating, editing, and manipulating digital images. With its wide range of features, Photoshop caters to various creative needs, including graphic design, photo retouching, and digital art creation.
Photoshop is widely renowned for the following reasons.
- Graphic design capabilities: Photoshop provides a robust environment for designing logos, brochures, social media graphics, and other visual assets. Its tools allow you to work with layers, shapes, text, and effects to create custom designs tailored to your brand.
- Photo editing and retouching: Photoshop is renowned for its advanced photo editing capabilities. You can enhance images, remove blemishes, adjust colors, and apply filters to achieve the desired look and feel. These features come in handy when incorporating photographic elements into your logo design.
- Digital art creation: Photoshop’s brushes, drawing tools, and layer blending modes make it a favorite among digital artists. You can create illustrations, paintings, and complex compositions directly within the software. This flexibility allows you to incorporate artistic elements into your logo design.
Why use Photoshop for logo design?
Photoshop is not the industry standard when it comes to logo design. Other tools like Adobe Illustrator and Inkscape are more widely recognized in the world of logo design.
But, Photoshop is still a competent tool for designing your new company logos. It has tools that might not be specifically for logo designing, but can still achieve the same results as tools like Illustrator.
Here’s what makes Photoshop a good tool to design your logo.
- Precise control: Photoshop’s layer-based workflow allows you to work on individual elements of your logo separately. This level of control enables you to make fine-tuned adjustments, ensuring every aspect of your logo is polished and aligned with your vision.
- Extensive tool set: Photoshop offers a wide array of tools for creating and editing graphics. From basic shape tools to advanced pen tools, you have the flexibility to create intricate designs and customize every detail of your logo.
- Creative freedom: With Photoshop, you can experiment with different colors, gradients, patterns, and effects to achieve unique visual styles. The software’s vast collection of filters and layer blending modes opens up endless creative possibilities for your logo design.
It is important to keep in mind that even though Photoshop is an incredibly useful tool, you’ll only make a good logo if you know what you’re doing.
However, if you want an easier alternative, try Logo Maker. Our AI Logo generator will give you multiple options in less than a few minutes.
How to make a logo in Photoshop
Creating a logo in Photoshop involves several key steps that help you bring your design concept to life. By following this process, you can craft a professional and impactful logo using Photoshop’s powerful tools and features.
- Set up your canvas
- Sketch your logo concept
- Create basic shapes
- Add text and typography
- Refine and customize
- Ensure scalability
- Save and export
Step 1: Set up your canvas
To start designing your logo in Photoshop, follow these steps.
P.S. We’re using the 2023 version of Photoshop, so some features might look a little different if you’re on the new version.
- Create a new document: Go to File > New or use the keyboard shortcut Ctrl+N (Windows) or Command+N (Mac) to open the New Document dialog box.
- Set the dimensions: Enter the width and height of your canvas in pixels. For a versatile logo, start with a square canvas of 1000×1000 pixels or larger. This allows flexibility for resizing later.
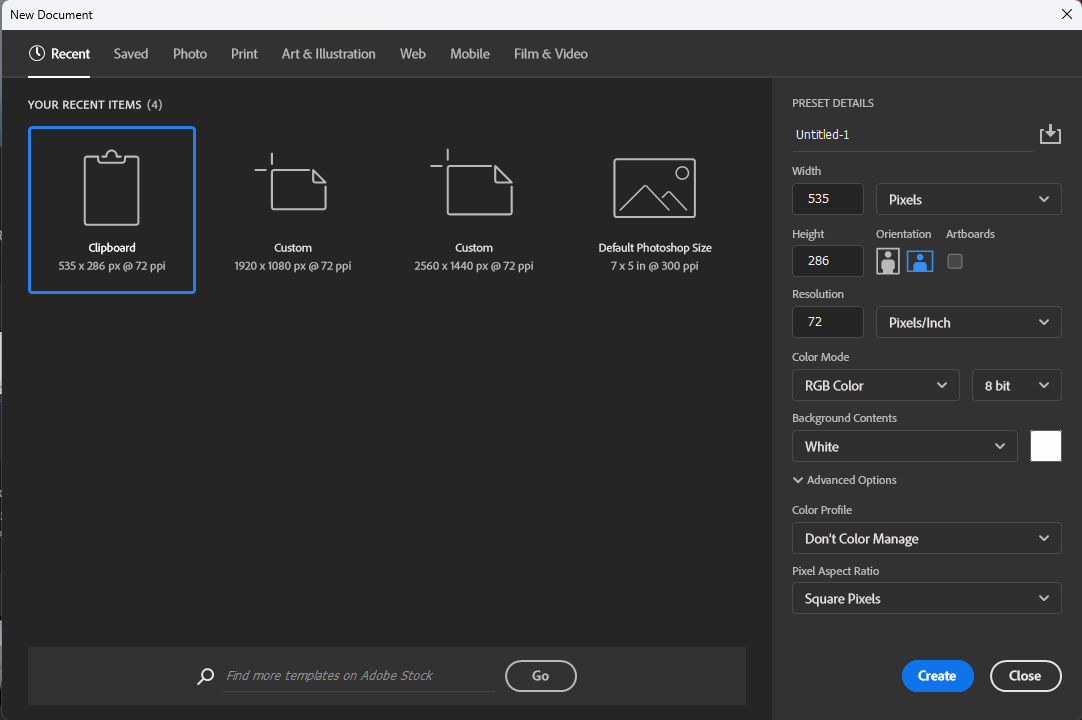
- Choose the resolution: Set the resolution to at least 300 pixels/inch for print-quality logos. For web or digital use, 72 pixels/inch suffices.
- Select the color mode: Choose RGB color for digital designs or CMYK for print projects.
- Set the background contents: Choose transparent to create a logo with a transparent background, making it easy to place on various colored backgrounds.
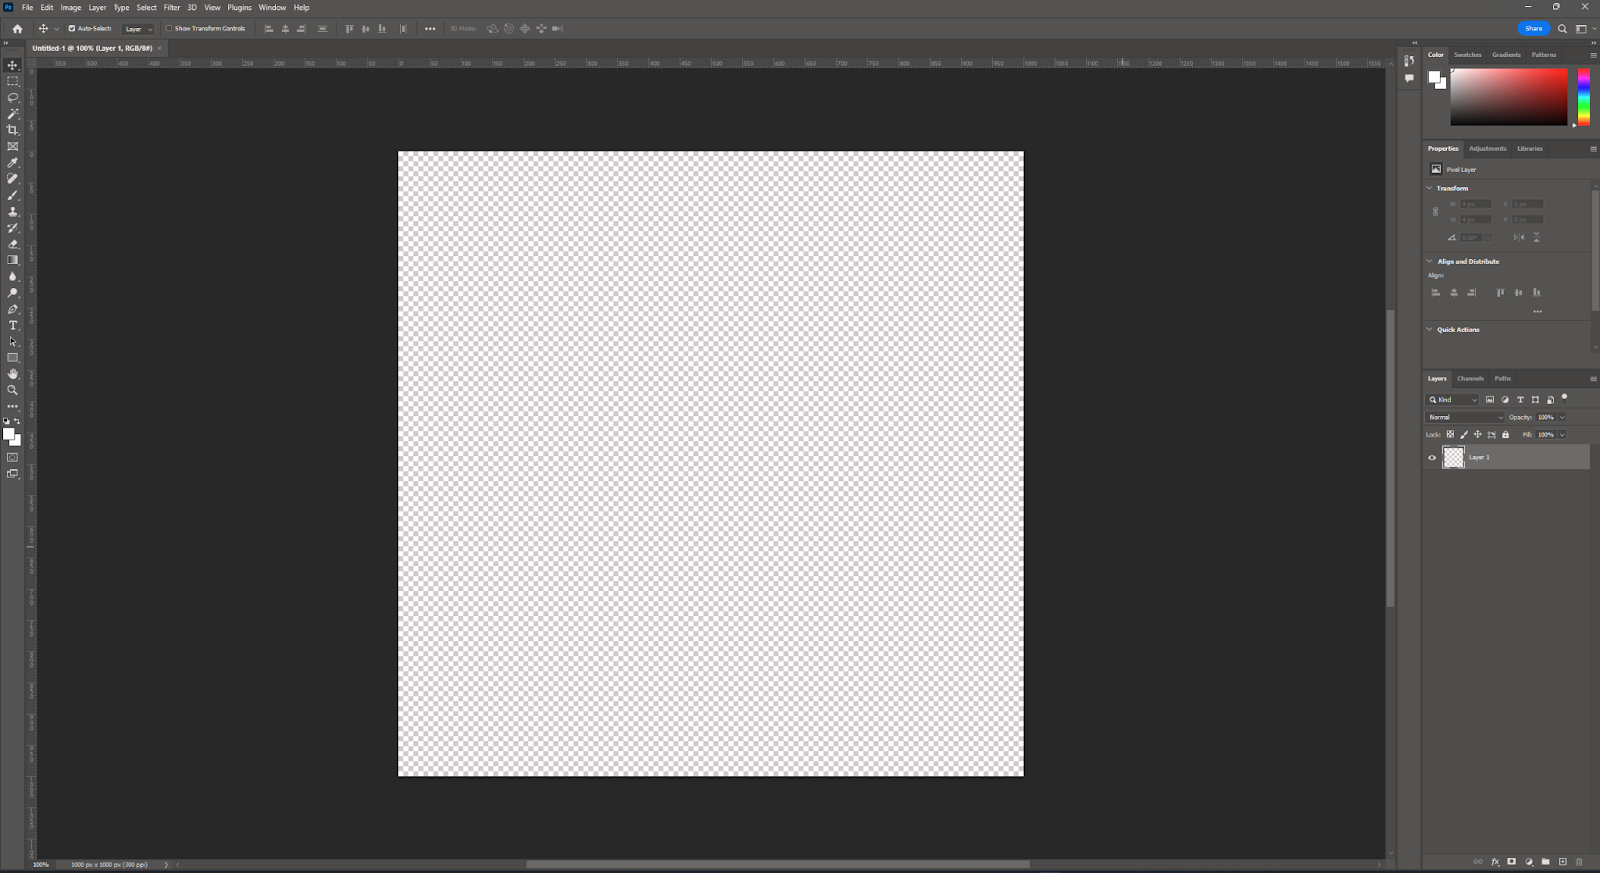
Click Create to open your new canvas. You’re now ready to start designing your logo in Photoshop. Your canvas will look something like this.
Step 2: Sketch your logo concept
The next step here is to start creating a rough sketch of your logo. Remember, sketching is an iterative process. Don’t be afraid to explore multiple ideas and revise your sketches until you arrive at a concept that effectively represents your brand.
Here are some ways to get your logo started.
- Brainstorm ideas: Take some time to think about your brand identity, target audience, and the message you want your logo to convey. Jot down keywords, symbols, or images that represent your brand.
- Explore different styles: Consider various logo styles, such as wordmarks, lettermarks, pictorial marks, abstract marks, or a combination of these. Experiment with different approaches to find the one that aligns with your brand personality.
- Create rough sketches: Start sketching your logo ideas on paper or using a digital drawing tablet. Don’t worry about perfection at this stage; focus on capturing the overall composition and layout of your logo.
- Refine your sketches: Once you have several rough sketches, refine the most promising ones. Simplify shapes, experiment with different proportions, and add more detail to create cleaner, more polished sketches.
- Get feedback: Share your sketches with colleagues, friends, or potential customers to gather their opinions and insights. Their feedback can help you identify the strongest concepts and make necessary improvements. Feedback at this stage of the process can help make sure that you don’t create a full-fledged logo with a flaw that a second set of eyes could have prevented.
Step 3: Create basic shapes
With your logo concept sketched out, it’s time to bring it to life in Photoshop using basic shapes. Here’s how:
- Select the appropriate shape tool: Photoshop offers a variety of shape tools, including Rectangle, Rounded Rectangle, Ellipse, Polygon, and Custom Shape. Choose the one that best suits the elements in your logo sketch.
- Draw the shape: Click and drag on your canvas to create the desired shape. Hold the Shift key while dragging to maintain perfect proportions (e.g., a perfect circle or square).
- Adjust the shape properties: In the Options bar at the top, you can modify the fill color, stroke color, and stroke width of your shape. Experiment with different colors and stroke settings to achieve the desired look.
- Combine and arrange shapes: Create multiple shapes and arrange them to form the basic structure of your logo. Use the Move Tool (V) to position and align the shapes precisely.
- Use the Path Selection Tool: This tool allows you to select and edit individual paths within a shape. You can move, add, or delete anchor points to refine the shape’s contours.
- Utilize the Shape Modes: In the Options bar, you’ll find various Shape Modes such as Combine, Subtract, Intersect, and Exclude. These modes allow you to create complex shapes by merging or subtracting multiple shapes.
- Group and organize shapes: As you create more shapes, keep your Layers panel organized by grouping related shapes together. Select the desired layers and press Ctrl+G (Windows) or Command+G (Mac) to create a group.
Remember, the key to creating a strong logo is simplicity. Start with basic shapes and gradually refine them to create a clean and memorable design. Don’t be afraid to experiment and iterate until you achieve a composition that effectively represents your brand.
Step 4: Add text and typography
Now that you have designed the
- Select the type tool: Click on the Type Tool (T) in the toolbar or press T on your keyboard to activate it.
- Choose a font: In the Options bar at the top, click on the font dropdown menu and select a font that aligns with your brand identity. Consider the personality and readability of the font.
- Set the font size: Adjust the font size in the Options bar to ensure your text is proportionate to your logo design. You may need to experiment with different sizes to find the right balance.
- Pick a font color: Click on the color swatch in the Options bar to open the Color Picker. Choose a color that complements your logo shapes and reflects your brand colors.
- Create a text layer: Click on your canvas where you want to place your text and start typing. Each time you click and type, Photoshop creates a new text layer in the Layers panel.
- Align and position your text: Use the Move Tool (V) to position your text in relation to your logo shapes. You can align the text using the alignment options in the Options bar.
- Adjust character spacing: Fine-tune the spacing between individual characters by selecting the text layer and adjusting the tracking, kerning, and leading values in the Character panel (Window > Character).
- Experiment with text styles: Play around with different text styles, such as bold, italic, or all-caps, to find the most suitable style for your logo. You can access these options in the Character panel.
- Transform and warp text: To create unique text effects, you can transform or warp your text. Right-click on the text layer and select “Convert to Shape.” Then, use the Transform options (Edit > Transform) or the Warp Text tool (Edit > Transform > Warp) to manipulate the text shape.
- Integrate text with shapes: Experiment with placing your text inside, outside, or overlapping your logo shapes to create a cohesive composition. Use layer ordering and blending modes to achieve the desired effect.
Remember, typography plays a significant role in your logo’s overall impact. Take the time to explore different font options and styles to find the perfect combination that represents your brand effectively.
Step 5: Refine and customize
Now that you have the basic structure of your logo in place, it’s time to refine and customize it to achieve the desired visual impact. Photoshop offers a wide range of editing tools that allow you to fine-tune every aspect of your logo design.
Adjust colors
- Use the color picker: Double-click on the color swatch in the Layers panel to open the Color Picker. Experiment with different color combinations that align with your brand identity and evoke the desired emotions.
- Apply gradients: Add depth and dimension to your logo by applying gradients. Select the layer you want to apply the gradient to, then click on the Gradient Tool (G) in the toolbar. In the Options bar, choose the desired gradient type and colors. Click and drag on your canvas to apply the gradient.
- Utilize patterns: Incorporate patterns into your logo design to add visual interest. Go to Edit > Fill and select Pattern from the Contents dropdown menu. Choose a pre-existing pattern or create your own using the Pattern Maker (Edit > Define Pattern).
Add depth and dimension
- Apply layer styles: Right-click on a layer and select Blending Options to access a variety of layer styles, such as Drop Shadow, Bevel and Emboss, and Gradient Overlay. Experiment with different settings to add depth, shadows, and highlights to your logo elements.
- Utilize layer blending modes: Change the blending mode of a layer to control how it interacts with the layers beneath it. Blending modes like Multiply, Screen, and Overlay can create interesting visual effects and enhance the overall look of your logo.
- Adjust layer opacity: Reduce the opacity of a layer to create subtle transparency effects. This can be useful when overlaying text or shapes on top of other elements to create a sense of depth.
Refine shapes and edges
- Use vector masks: Apply vector masks to your layers to create precise, non-destructive edits. Vector masks allow you to hide or reveal parts of a layer using shapes and paths, giving you complete control over the visibility of your logo elements.
- Smooth edges with anti-aliasing: When creating shapes or text, ensure that the Anti-Alias option is selected in the Options bar. Anti-aliasing smooths the edges of your logo elements, creating a cleaner and more professional look.
- Utilize the pen tool: For precise shape editing, use the Pen Tool § to create and modify paths. You can add, delete, or move anchor points to refine the contours of your shapes, ensuring they are perfectly aligned with your design vision.
Remember, refining and customizing your logo is an iterative process. Take the time to experiment with different colors, effects, and refinements until you achieve a polished and professional result that effectively represents your brand.

Step 6: Ensure scalability
A well-designed logo should maintain its clarity and impact across various sizes and applications. As you finalize your logo in Photoshop, it’s important to test its scalability to ensure it remains effective in different contexts.
- Create multiple size variations: Duplicate your logo and scale it down to smaller sizes, such as 50%, 25%, and even 10% of its original size. Observe how the details and legibility hold up at these reduced scales.
- Simplify intricate elements: If you notice that certain elements of your logo become unclear or cluttered at smaller sizes, consider simplifying those parts. Remove unnecessary details or merge similar shapes to maintain clarity.
- Adjust line weights: Fine lines and delicate elements may disappear or become indistinct when scaled down. Increase the line weights of these elements to ensure they remain visible and impactful at smaller sizes.
- Test in different contexts: Place your logo on various backgrounds, such as dark, light, and textured surfaces, to assess its versatility. Make adjustments to the colors or contrast if needed to maintain legibility in different environments.
- Seek feedback: Show your scaled logo versions to colleagues or friends and gather their feedback. Ask if they can easily recognize and understand the logo at different sizes. Their input can help you identify areas that may need further refinement.
Remember, a scalable logo is one that retains its essence and impact regardless of its size. By proactively testing and refining your logo’s scalability in Photoshop, you can ensure that it will be effective across a wide range of applications, from business cards to billboards.
Step 7: Save and export
- Save your Photoshop file: Go to File > Save As and choose the location where you want to save your logo file. Select “Photoshop (*.PSD)” as the file format to preserve all the layers and edits you’ve made. This allows you to easily make changes or updates to your logo in the future.
- Create separate folders for different file types: Organize your exported files by creating separate folders for each file type (e.g., PNG, JPEG, PDF). This helps keep your logo files organized and easy to locate when needed.
- Export as PNG: To export your logo as a PNG file, go to File > Export > Export As. In the Export As dialog box, select PNG from the Format dropdown menu. Choose a destination folder and click Export. In the PNG Export Options dialog box, select the desired resolution (e.g., 300 ppi for print, 72 ppi for web) and click OK. PNG files support transparency, making them ideal for web use.
- Export as JPEG: To export your logo as a JPEG file, go to File > Export > Export As. In the Export As dialog box, select JPEG from the Format dropdown menu. Choose a destination folder and click Export. In the JPEG Export Options dialog box, select the desired quality and resolution, then click OK. JPEG files are commonly used for print materials and online graphics where transparency is not required.
- Export as PDF: To export your logo as a PDF file, go to File > Save As. In the Save As dialog box, select Photoshop PDF from the Format dropdown menu. Choose a destination folder and click Save. In the Save Adobe PDF dialog box, select the desired quality settings and click Save PDF. PDF files are versatile and can be used for both print and digital purposes.
- Test your exported files: Open your exported logo files in various applications and contexts to ensure they display correctly. Check for any quality issues, such as pixelation or loss of transparency, and make adjustments in Photoshop if needed.
Remember to save your Photoshop file regularly throughout the design process to avoid losing any work. Exporting your logo in multiple file formats ensures that you have the necessary files ready for various applications, whether it’s for your website, social media, business cards, or merchandise.
Step 8: Review and feedback
Once you have your logo designed in Photoshop, it’s beneficial to step back and review your work. This stage allows you to spot any potential improvements and ensures your logo aligns with your brand vision.
Share your logo with trusted colleagues, friends, or family. They can offer valuable insights from a new perspective. Remember, constructive criticism helps refine your design.
Closing thoughts
Creating a logo in Photoshop equips you with a unique design that captures your brand’s essence.
However, for those seeking a more straightforward approach without compromising on professionalism, LogoMaker offers a viable solution. Our platform simplifies the logo creation process, making it accessible to everyone regardless of their design experience.
With a vast library of customizable templates, creating a professional logo becomes a hassle-free experience, saving you time and effort.
Create a Logo for free today and bring your brand to life with ease and confidence. No payment is required until your design is complete.
How to make a logo in Photoshop: Frequently asked questions
Where can I find tutorials for logo design in Photoshop?
You can find numerous tutorials on logo design in Photoshop on YouTube, Adobe’s website, and various design blogs and forums. These tutorials cover basic to advanced techniques for creating stunning logos.
Are there any specific requirements for a logo file in Photoshop?
It’s essential to create your logo in a high-resolution format to ensure it looks crisp and clear when scaled. Aim for a minimum resolution of 300 DPI (dots per inch) for print and 72 DPI for web.
Do I need design experience to make a logo in Photoshop?
While design experience can be helpful, Photoshop offers plenty of tutorials and resources for beginners. With practice and experimentation, anyone can create a logo in Photoshop. However, the complexity of your logo will be highly dependent on your skill level and experience with Photoshop.