Crafting an eye-catching business card is one of the best ways to build your company’s brand and garner the attention of potential clients. In our modern world, where digitization is becoming increasingly common, the business card remains a powerful tool that can lead to meaningful connections with customers.
Your business card is a pocket-sized advertisement for your business, so it has to not only provide clients with important contact information but also give them an idea of what your company does. Fitting all of that into a 3.5″x 2″ rectangle may seem daunting, but with our expert advice, you’ll have an amazing business card in no time!
In this article, we’ll take you through the step-by-step process of how to make a business card using Adobe Photoshop. We’ll go over the appropriate business card size, Photoshop tips and tricks, as well as a plethora of design inspirations.
- Installing Adobe Photoshop
- Setting Up Your Business Card Photoshop File
- Adding Color to Your Business Card Design
- Inserting Text Into Your Business Card
- Incorporating Graphics Into Your Business Card
- Preparing Your File for Print
- Using LogoMaker to Create Business Cards
Installing Adobe Photoshop
Since its invention in 1987, Photoshop has been the industry standard for digital art and raster graphics editing. Unlike other online design tools, Photoshop allows you to customize every element fully, ensuring your business card reflects your unique brand identity.
Additionally, Photoshop supports high-resolution formats and CMYK color mode, which is perfect for producing crisp, professional-quality printed graphics. By designing in Photoshop, you retain control over the file format, allowing easy edits and adjustments as your business evolves.
Quick Installation Guide for Photoshop
- Visit the Adobe website (www.adobe.com) and navigate to the Photoshop product page.
- Click on “Free Trial” or “Buy Now” depending on your preference.
- Follow the prompts to create an Adobe account or sign in if you already have one.
- Download the Adobe Creative Cloud installer.
- Run the installer and follow the on-screen instructions to complete the installation.
- Once installed, open Creative Cloud and click the Photoshop icon to install the program.
- After installation, launch Photoshop by clicking the blue icon on your computer screen.
Setting Up Your Business Card Photoshop File
Photoshop is a robust editing tool with hundreds of different features. However, its steep learning curve can be challenging for users with no prior image editing experience.
In this section, you’ll learn how to design a business card in Photoshop, starting with setting up your business card-size Photoshop file.
Step 1: Open Photoshop
Launch Adobe Photoshop by clicking on the blue icon that reads “Ps” on your computer screen.
Step 2: Create a New Blank Photoshop File
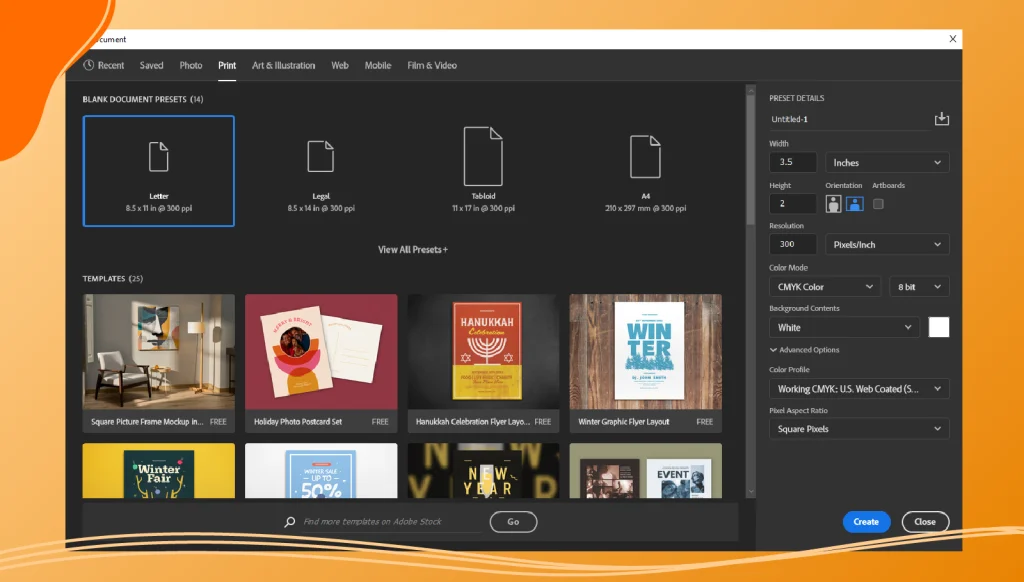
Click the file button on the menu bar at the top of the screen. Then click the new button, which is the first option in the file drop-down menu. This will display a pop-up window you can use to create a new Photoshop document.
Step 3: Set Document Size
A standard business card is 3.5’’ x 2’’. You can use a business card with custom dimensions, but it might not fit properly in wallets or purses.
In the pop-up window, type 3.75 next to “Width” and 2.25 next to “Height.” This creates a document that is 3.5 x 2 inches with a 1/8th-inch ‘bleed’ area around the edges.
Step 4: Set Document Resolution
Type 300 next to “Resolution.” This creates a file that has a resolution of 300 pixels per inch to ensure a sharp and clear design. This is standard for most print materials.
Step 5: Select Color Mode
Select “CMYK” for the color mode. Use the drop-down menu next “Color Mode” to select “CMYK”.
Step 6: Create Guidelines
This step is optional but will greatly help you when designing your business cards. Click the view button on the top menu bar and then click “Rulers,” which will turn on rulers for your documents.
To create a guideline, click on the ruler at the top-left of your document and drag it inwards. Do this to create two horizontal lines at 0.125 inches and 2.125 inches. Then, use the same procedure to create two vertical lines at 0.125 inches and 3.625 inches.
Step 7: Save & Export Your File
Click the file button and then the save as button to save your business card file. Make sure to select “PSD” as the file format. PSD is the file format that is native to Photoshop. Saving your files in Photoshop format is the best way to preserve the color detail and editable layers.
After saving your PSD file, which is your Photoshop-only format, you can export the design into a widely used format such as .PNG or .JPG or even .PDF if you want it to be printed in high quality materials. For that, be sure to click File > Export > Export As or File > Save a Copy to save it under a different format.
Tip: It is important to save frequently when working on a Photoshop session to ensure you don’t lose any of your work. To save your work, click the file button and then the save button in the drop-down menu or click ctrl + S on Windows and Command + S on Mac.

Adding Color to Your Business Card Design
Color is an incredibly important aspect of a successful business card design. The colors you use can have a psychological effect on your audience, so make sure to choose wisely. For example, the color blue tends to send a message of serenity, security, and logic, which is why it’s such a popular option for technology companies.
In this section, we’ll go over how to add color to your business card in Photoshop.
Step 1: Open the Color Picker
Click on the two overlapping colored squares located on the toolbar on the left-hand side of the screen. This will open up the color picker pop-up window where you can choose a color for the foreground and background.
Step 2: Color Your Canvas
Click the paint bucket tool. The paint bucket tool is used to fill an entire area with the foreground color. By clicking anywhere on your card it fills the entire document with the foreground color you chose.
Step 3: Adding a Gradient
If you want your business card to really stand out, you can add a gradient, which will gently transition from one color to another. To do this, click and hold the gradient tool in the toolbar. The icon will resemble a square with a white-to-black color fade.
If you want to create a color-gradient fade, use the background color square to select the color you want the gradient fade to transition to. Then click the gradient tool, and click and drag across the entire area you want the color transition to take place.
Tip: Photoshop has a wide variety of different gradient transition types, so search around and find one that you think looks best on your business card.
Inserting Text Into Your Business Card
What your business card says is just as important as how your business card looks. Your business card should have all of your company’s relevant information, including your name, a business email address, a business phone number, social media profiles, and, of course, your company logo.
In this section, we’ll go over how to add text to your business card in Photoshop.
Step 1: Choose a Font
Click the “T” icon on the toolbar on the left side of your screen to select the text tool. Use the drop-down menu in the upper-right corner to select your font.
In this menu, you can also choose the font color. For readability, use a light-colored font on dark backgrounds or a dark-colored font on light backgrounds.
Step 2: Select Where Your Text Will Go
Click where you want the text to go in the document. This places a text cursor on the page.
Step 3: Type Your Text
This creates the first text item on your business card. Repeat for as many text items as you want on your business card. Your lines of text should be aligned and centered for a clean and professional look.
Tip: You can use the Layer Menu to organize all the text layers, keeping them separate from the graphics layer. We’ll touch on layers in the next section.

Incorporating Graphics Into Your Business Card
There is a wide range of interesting graphics that you can add to your business card. However, the most important graphic that you need to add is your company logo. Your logo is a visual representation of your company and should be included in all promotional materials, such as business cards, billboards, brochures, or pamphlets.
If your company doesn’t have a logo, you can create your own custom logo in minutes using LogoMaker‘s suite of powerful logo design tools and resources.

Here is how you add graphics to your business card design.
Step 1: Activate Layers
Click the “Layers” tab in the sidebar to the right. This displays the Layer menu with a list of layers. You can use layers to separate different elements of your document.
Step 2: Create a New Layer
Click the icon that resembles a sheet of paper. It’s at the bottom of the Layer menu in the lower-right corner. This creates a new layer, which should appear above the background layer. You can rename this layer to “Graphics” and use it for all graphic design elements.
Step 3: Reposition the Graphic Layer
To change the position of a layer, click and drag the layer in the Layer menu in the sidebar to the right. Drag the layer below all the text layers but above the Background layer.
Step 4: Create Simple Graphics for Your Business Card
You can use the brush tool to create simple patterns and graphics for your business card document. Experiment with different elements, such as faded circles, to add flair to the design.
Step 5: Importing Logos Into Your Business Card
While you can choose to create your logo right in Photoshop, you might have your logo image saved on your computer. You can import your logo by clicking “Place Embedded” in the file menu and importing your logo file from your computer.
After you’ve positioned your logo where you want it, click the checkmark icon. It’s at the top of Photoshop. This confirms the position of the photo and places it as a new layer.
Tip: Use the transform tool in Photoshop to alter your logo and keep to image dimensions proportional to the rest of the business card. If your logo is too large, it can make it difficult to make out the contact information.
Saving Your Photoshop File
As you create business cards using Photoshop, you should be saving your files as you go to ensure you don’t lose any progress. Once you finish your business card completely, here is how to save the file in the appropriate format.
- Go to the File Menu and select Save As.
- In the file browser, choose a destination for your project and select Photoshop format (PSD) to keep an editable version.
- For print services, save a copy in PDF or TIFF format. The drop-down menu shows different export options.
- Click Save.
Preparing Your File for Print
The printing process is the final step when you create business cards for distribution. This is where things can go wrong if you’re not careful. Always print a test copy to check the colors and layout before printing a large quantity. Check for any errors or issues with the design, such as pixelation or blurry text.
Check with your print shop for the required file format, which can be Photoshop, PDF, or JPEG. Save your file in the required format and ensure it is in CMYK color mode. Make sure the image dimensions are proportional to the print size.
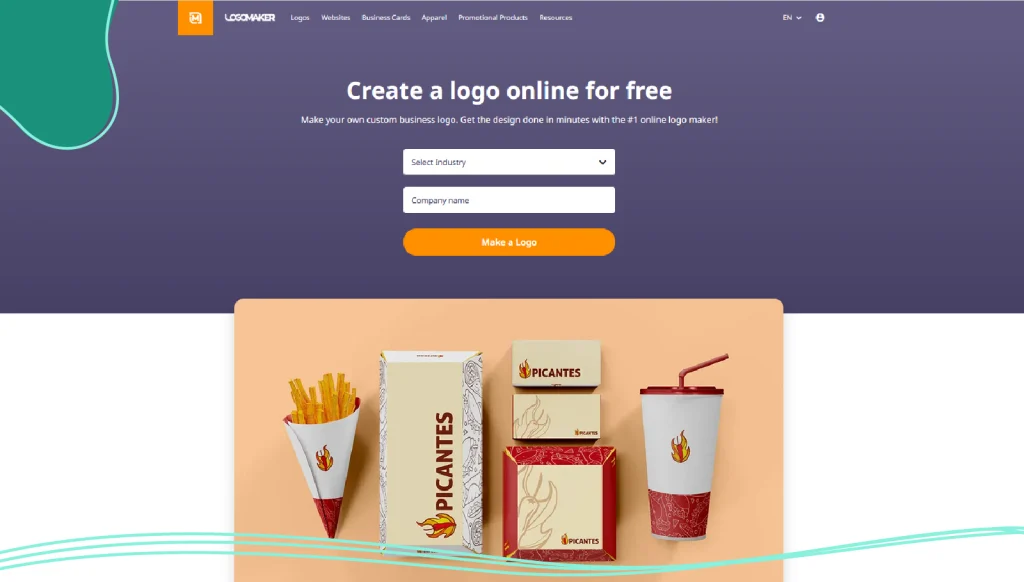
Using LogoMaker to Create Business Cards: A Much Easier Alternative
Photoshop is a powerful tool that can create some amazing business cards. However, the process can be quite difficult for beginners. For those seeking a simpler, more accessible option for crafting a professional business card, LogoMaker emerges as a compelling and very easy-to-use alternative to Photoshop.
This user-friendly online platform enables individuals and businesses to create stunning, custom logos without the need for extensive design knowledge or experience.
No need to hire a professional graphic designer; you simply choose a template that suits your business needs and style. Then customize the template by editing the text, inserting your logo, and modifying other design elements. With fast shipping turnarounds, quality paper printing options, and affordable prices for business cards, LogoMaker is the perfect fit for all businesses.
Conclusion
By leveraging Adobe Photoshop’s advanced design tools and customizable features, you can create business cards that not only reflect your brand but also leave a lasting impression. Investing time into creating high-quality, visually appealing custom business cards can help strengthen your professional image, attract potential clients, and grow your business.
If you’re having trouble creating business cards with Photoshop, LogoMaker has a large library of full-color business card templates from a variety of industries. Create a professional business card in just minutes, and start promoting your business today!

Frequently Asked Questions
What is the best business card size in Photoshop?
The standard business card size in Photoshop is 3.5 x 2 inches. Be sure to set the resolution to 300 DPI for high-quality printing. You can see some business card designs in our Business Card Maker tool.
What file format should I save my business card in?
Save your business card as a PSD (Photoshop format) for editing. For print, export the file as a PDF or TIFF to ensure the highest quality.
Can I use free business card templates in Photoshop?
Yes! There are many free business card templates available online. You can download and open them in Photoshop to customize. If you’re having trouble with the complexity of the program, you can always use our easy to use our Business Card Maker tool.
How can I make my business card stand out?
Create business cards that stand out by using contrasting colors, professional fonts, and unique design elements like gradients, simple patterns, and graphics. Keeping the font consistent and readable is crucial.
What color mode should I use for print materials?
Always use CMYK mode when you create business cards you intend to print to ensure accurate color reproduction on the printed material. You can always consult our Business Card Maker tool
How do I ensure my design prints correctly?
Double-check the image dimensions, add bleed areas as required by your print service, and review the design at 100% zoom on your screen.

